Saturday, January 30, 2016

Six Methods to Control Snails and Slugs in Your Garden


While I no longer live on the Gulf Coast, one particular year there is forever imprinted in my memory. The snail infestation was so bad each morning I would find dozens upon dozens on the outside doors and walls of the house, the upper porch, the steps and handrails of the staircase to the porch, every walkway – even on my car! The damage being done to the plants in the yard and planters was beyond anything I had ever seen. Gardening has its challenges and one of those is combating snails and slugs! 

If the spring of 2016 is anything like the spring of 2015 with its frequent periods of rain every week, we will see a population explosion of snails and slugs; they absolutely thrive in moist, humid environments like those of the Texas Gulf Coast and East Texas.

As nocturnal feeders, snails and slugs may rarely be seen feeding, but if you find slime trails around your garden area and holes chewed in your leafy, green garden plants the culprits are without a doubt snails or slugs. 

Snails are mollusks; mollusks are invertebrate animals with a soft unsegmented body usually enclosed in a calcareous shell. While the snails themselves can be destructive to our vegetation, they also serve as intermediate hosts to parasites, such as liver flukes. The subject of liver flukes is way beyond this article, but suffice to say depending on the area of the world and the species of fluke in the environment - livestock, including cattle, horses, sheep, pigs, and poultry, not to mention cats, dogs, and humans may become infected by these damaging parasitic worms. So, in my book any dead snail is a “good” snail - period!

Methods available for combating snails and slugs in the garden include – chemical applications, non-chemical applications, habitat modification, direct intervention, the introduction of natural predators, and the selection of deterrent plants. 

1) Chemical applications – Metaldehyde, is the active ingredient in many off-the-shelf products and is the most common chemical used for combating snails and slugs; however, there have been reports of children, pets – particularly dogs and cats - and bird poisonings (some fatal) from ingesting this chemical. If used, extreme care should be exercised in following all the manufacturer’s label recommendations! 

2) Non-chemicals applications - I lean towards integrated pest management (IPM), especially the environmentally friendly methods. For example, in lieu of the toxic Metaldehyde I prefer ferric phosphate – sometimes known as iron phosphate – it is commonly found in nature and is not harmful to humans, birds, animals, or the environment. When applied on the soil in pellet form as a bait, snails and slugs are attracted to and ingest the ferric phosphate pellets which interferes with their digestion – the snails and slugs stop eating and die within a few days. I have used ferric phosphate in my gardens for several years now and have been very pleased with the results – and yes, it may be used in an organic program with restrictions which require the use of preventative, mechanical, physical, and other pest, weed, and disease management practices. Check http://www.omri.org/omri-lists for products such as “Sluggo” that contain ferric phosphate or visit your local garden center. 

It should be noted that some of the ferric phosphate products available on today’s market contain active ingredients other than just ferric phosphate – I do not use these products. As with all substances you are going to place in your garden – whether a pellet, spray, or powder – take the time to read the product label carefully and completely. Identify the product’s active ingredients, target pests, how to correctly apply the product, and any known hazards with its usage before you introduce it into your garden! Any “extra” active ingredients may not meet organic requirements. I often research active ingredients separate from product labels to get a broader spectrum of information – and am often surprised over the results of these independent searches. 

During my research I came across a staff publication by the USDA National Wildlife Research Center, University of Nebraska – Lincoln. The publication reported on testing the use of a 2% solution of caffeine sprayed either directly onto snails/slugs or on the soil in which slugs have burrowed; they had success with this but also noted that it did have some adverse effect on the surrounding plants. So, far, I have not been able to find any indication that further testing has been done using caffeine as a control method although there are many articles from many sources on the Internet touting its use. Folks, my question is – will this caffeine solution affect the pollen and nectar of plants? At this point, I do not know - until and unless I see some test results from additional science centers, I will forego using this method, mainly because of the pollinators – the birds, all the different bees and other beneficial insects that I try to encourage to take up residence in my garden. I know I can use other methods for control that are safe and proven to work. Additionally, I have found some indication that this method of control may not meet all organic program requirements; if you are organic, be sure to check this out before using caffeine in the garden. 

3) Habitat modification - Another approach is to alter the environment which snails and slugs use as refuge and breeding grounds by removing debris and dense ground cover, such as ivy and other succulents, stacks of boards and wood, and large wood chip mulches from the garden area. Thin out the plants to improve air circulation and use a mulch containing materials with thick, jagged edges such as eggshells. Snails have soft underbellies and will avoid anything sharp or prickly. 

4) Direct intervention - Try utilizing barriers such as a simple line of table salt around the outer garden bed, wood ash, diatomaceous earth, sawdust, copper backed paper or sheeting, sand, sulphur, animal or human hair, pine needles, thistle leaves, or straw. Keep an eye on your barriers as some of them may need to be re-built from time to time, especially after a hard rain or strong wind. Table salt, while very effective in combating snails, is fatal to plants. It should be used sparingly and never applied directly to the garden beds. Instead lay a small line of salt on a driveway or sidewalk that appears to be a regularly traveled path for the snails or slugs.
 
Set traps - snails love sweet things such as sugar water, fruit juice, soda pop and believe it or not, beer! For a homemade trap using one of the liquids, partially fill a plastic pot with a tight fitting lid and slots cut into the side, bury it in the ground to the level of the opening. Snails fall in and are incapable of getting out of the trap. Additionally, small boards raised slightly (1 inch) off the ground serve as effective traps. Snails will attach themselves to the boards during the day and can easily be found and destroyed. Commercially made traps are also available through garden centers and the Internet. 

Do hand combat – go out to the garden, find, and hand pick the snails from your plants and surrounding areas, such as trees, walls, and stones. Once captured, you can easily destroy the snails by dropping them in salty water or crushing them. 

5) Introduce natural predators - Bring in the support troops – fortunately snails have many natural enemies; among them are frogs and toads. Whenever possible, create a small pond in the garden to encourage frogs and toads to make their home there. The smaller ones love self-watering pots. Frogs and toads are great – no plant damage and they eat other garden pests, as well as snails!  Chickens, ducks, and guinea hens consider snails a tasty snack; people who own and allow them to free range seldom encounter snail and slug problems on their property. 

6) Deterrent plants  - And lastly, consider some plants for your ornamental garden that are less prone to snail damage such as ornamental grasses, impatiens, rosemary, sage, lavender, begonias, nasturtiums, narcissus, geranium (cranesbill), alyssum, roses, daylilies, and hydrangea. 

There is no need to live with snails and slugs destroying your garden or compromising the health of you, your pets, and livestock when you have so many different options available for controlling them – and most are environmentally friendly as well!

Saturday, January 23, 2016

Five Reasons to Grow Swiss chard


Looking for a delicious and nutritious plant for your spring or fall vegetable garden that is easy to grow – try Swiss chard!
 
There are many good reasons for adding Swiss chard to your garden - 
 
1) Nutrient rich - A member of the beet family, Chard is grown for its delicious edible leaves and stems. “Nutrient rich” - it serves as an excellent source of vitamins and minerals, including but not limited to, Vitamins K, A, C, E, B2 and B6, magnesium, iron, calcium and potassium.
 
2) Easy to grow - Novice gardeners will find it is easy to grow from seed. It is heat tolerant and will outperform other greens. Chard is capable of withstanding light frosts and moderate freezes. With a little care and forethought it can be grown almost year-round in southeastern Texas including the coastal area.
 
Although seed manufacturers suggest planting Chard in full sun, they obviously don’t live in southeastern Texas! Providing Chard with some shade in the late summer afternoon is beneficial in our climate. When overheated Chard will lie down almost flat on the ground – just give it a good watering and it will recover.
 
3) Beautiful plant - Chard is an excellent choice for edible landscape planting in the traditional garden, or in containers and does well in an average soil with some compost and good drainage.  Chard produces thick, dark green leaves; its stems, depending on the variety grown, range in color from creamy white to red, while the “Bright Lights” variety stems display many colors of the rainbow.
 
4) Few diseases or pests - This plant is almost disease and pest free with snails and slugs being the biggest issue. “Sluggo” can very effectively control these pests; it is a natural product based on iron phosphate, which is safe for your family, pets, and other critters, such as birds and bees that may visit your garden.
 
Good companion plants for Chard are beans, Brassica family members (i.e. broccoli, cauliflower, cabbage, Brussel sprouts, kale, etc.), and onions; there are no known bad companions for Chard.
 
5) Prolific producer - Chard averages 12 – 18 inches in height and can be harvested 60 days after planting or when it is about 6 inches tall. Swiss chard is a good “cut and come again” plant - to harvest sever some of the outer leaves about 1 inch above the ground; leave the rest. Occasional harvesting in this manner will encourage the plant to continue producing quality greens for your table long term. Harvest the leaves early in the day.
 
For best results use Chard immediately after it is harvested, although it will keep in the refrigerator for a day or two when placed in a plastic baggie with a slightly moist paper towel. Chard is versatile in the kitchen, equally delicious on its own or used as a substitute for any recipe requiring spinach. Chard is a definite winner both in the garden and in the kitchen!

Monday, January 4, 2016

Honey Bee Swarms

During the spring and summer months each year large clusters of honey bees are sometimes found hanging from limbs of trees, the eaves of homes, under lawn furniture, on car bumpers and other objects. The act that caused the honey bees to cluster outside of their hive is called “swarming”; it is a natural occurrence among honey bees.
 
There are many reasons for swarming – the hive has become overpopulated and congested; the colony has become diseased or is starving, or in some instances natural causes such as a forest fire may prompt the entire colony to swarm. The purpose of the act of swarming, no matter what the cause, is to ensure the survival of and to perpetuate the species.
 
In the Northern Hemisphere, the Honey Bee queen usually suspends egg laying in first week of November; this is to allow the population of the colony to contract to help preserve and prolong the food stores in the hive during the coming winter. She begins laying eggs again around January 9th in an effort to increase the number of bees in the colony in preparation for the coming spring nectar flows, thus swarming tends to happen during the months of April, May and June; the hive is becoming congested as the population increases and more area in the hive is taken up for the storage of pollen and honey. However, swarming can also happen in late summer and early fall.

When conditions prompt the urge to swarm, the colony begins to prepare for the swarm and on a predetermined signal, thousands of honey bees (the swarm) will leave the hive with the resident queen. The swarm will usually settle on something nearby – a tree, a building, lawn furniture, etc., - awaiting communication of a new nest location from their “scout bees”. Once the new nest location has been discovered, the entire swarm will relocate – usually within 24 hours - and begin the arduous job of building a new colony. In general, Honey Bee swarms are very docile since there is no nest to defend. But it is prudent not to disturb the bees; if you happen upon one just remain calm and quietly leave the area.
 
The problem begins if the scouts cannot find an optimal location for the swarm to re-locate to permanently. In this case, the swarm will move into the nearest protected area for self preservation. This is not always conducive to good neighbor relations as oftentimes it’s someone’s attic, garage, mailbox, or even an AC unit.
The nests can easily get quite large and begin causing problems within the structure itself from dripping honey and weight. To cure the problem, both the bees and the honey comb must be removed! Otherwise, the honey comb if left behind will attract another swarm of bees, or other insects, including ants and roaches, and will cause mold and mildew to form in and around the nest, as well. So, prompt action on the part of the homeowner at the first sign of the bees can minimize the possibility of future structure damage.
For help with honey bee swarms contact your local beekeepers' association, your local Agricultural Extension Office, or a professional pest control company for assistance.
**Photo courtesy, George Rodriguez, Owner - Rose of Sharon Honey, Pearland, Texas.


Monday, December 28, 2015

Honey Bees - Beginning a New Year


As the cold season approaches each year Honey Bee colonies go through a process of change - the workers (sterile females) are busier than ever stockpiling pollen - and nectar (transformed into honey) - to sustain the colony through the cold winter months. By November the Honey Bee queen (only fertile female in the colony) ceases to lay eggs; since no more baby bees are needed for a while it’s “Swan Song” time for the drones (males of the colony); they are permanently ejected from the hive.
 
Many of the older worker bees in the colony will begin to die off either from age or due to accidents while foraging for pollen and nectar. This in addition to the removal of the drones and the queen’s egg laying cessation for the year will cause the number of colony inhabitants to shrink from as much as 80,000 honey bees at the height of the warm season nectar flows to around 20,000 for the winter season. This is Mother Nature’s way of helping the colony to maximize its winter food stores.
 
During cold weather, except for “cleansing flights” (Honey Bees frown upon pooping in the hive!), the Honey Bees spend the majority of their time huddling within the protection of the hive to stay warm. There are a number of things that can go awry during this time that will impact the colony’s ability to survive the winter – disease or colony pests, such as Varroa mites, and/or starvation may overcome and kill the entire colony.
 
Assuming the colony has sufficient winter stores and all else has gone well during November and December, the Honey Bee queen will commence to laying eggs again – both female workers and drones - around January 9th (in North America) to re-build the colony’s population in preparation for the coming spring nectar flows. So January, February, and March, constitute a very critical time for the colony – as new bees hatch the colony’s food stores will be consumed at a much higher rate. In response the colony will begin to forage regularly again - when the weather permits - to supplement their stores; pollen availability is especially critical. Pollen provides protein, while nectar fulfills the carbohydrate needs of the colony. The newly hatching bees consume a lot of protein!
 
Since honey bees through their pollination services are responsible for about one in every three bites of food we humans take, it is in our best interest to incorporate plants that bloom early in the year into our landscape and garden plans. Here are just a few – the Eastern Redbud tree, Magnolias, Dogwoods, Camellias, Jasmine, and Honeysuckle. Many people consider Dandelions as being synonymous with “land mines” in their lawn, but Dandelions provide an important source of protein for honey bee colonies. I always leave a section of landscape for Dandelions; watching the bees work those bright, little yellow blooms after a cold winter makes for a blessed day!
 
Check with your local nursery to determine the trees and plants suitable for your area that will bloom during these early months each year, especially January and February.
 
And think about leaving a few Dandelions for the bees - just as humans need variety in their diets, so do the bees!

Tuesday, November 24, 2015

Buying Country Property


I often hear people fantasize about buying property in the country; if asked, I suggest that before they begin their search they clearly define their goals for the purchase, both short-term and long-term. Defining their goals will go a long way in ensuring the property ultimately purchased will serve their needs.
For example, a weekend getaway a short drive from your current home may have very different requirements than a place that will eventually become your full time home and a business enterprise, such as farming, ranching or tourism.
Do your homework – the Internet provides access to a vast array of information, use it to your advantage to help narrow your search to locations and communities which meet your needs. On-line databases of real estate listings aid in finding property listings in all 50 states in the U. S.
Depending on the type of property you desire determine areas of the country that might be good candidates – research the personal and property taxes in those areas, the demographics, school districts (if applicable), medical facilities, roadways and transportation, utilities and costs. If you plan on farming, ranching – for that matter any form of agriculture, research the best areas to support this in terms of climate, soil, rainfall, markets for your product, etc., and pay close attention to the current asking price for properties in the area! If you will be financing the purchase, find financial institutions that are willing to work with you on the purchase of country properties and determine their terms for financing! Some institutions have limits and guideline on financing rural properties – some will not finance acreage.
Do these things before enlisting the help of a realtor! Keep in mind that most realtors work on a commission basis; they appreciate working with clients who can clearly articulate their needs with respect to a property, have their finances in order, and are serious about making a purchase. Also keep in mind, that all realtors are not equal.
Before choosing a realtor – interview the realtor to ensure he or she possesses the knowledge and experience to ably assist your purchase of country property. I do not recommend engaging a realtor that is not familiar with the area in consideration and/or the sale or purchase of country properties. Just because a realtor has won awards for the number of homes sold in the city or suburbs does not mean he or she has the knowledge to ask the “right” questions in transactions involving country properties with acreage.
Oftentimes, buyers will contact a particular realtor because that realtor has a property “listed” for sale in an on-line database, for example, www.realtor.com. The realtor that advertises the property for sale can either be the owner of the property or has been engaged by the property owner to assist with the sale of their property. Buyers need to determine from the onset of contact with a realtor, who the realtor would represent in the transaction if the buyer decides to make an offer on the property. This is important – if the realtor is not going to represent you – the buyer – you will not be able to rely on the realtor for advice during the transaction; if you are not personally knowledgeable and experienced in the purchase of country property, this can place you in a serious disadvantage, both when the offer is written and negotiating terms of the contract through closing of the sale. Once you determine who the realtor represents, you can better decide how to proceed. For example, the realtor, even though he or she represents the owner, can schedule a “showing” of the property to afford you the opportunity to view the property in detail. The owner’s realtor may also supply you with certain information about the property, i.e., a “Sellers Disclosure”, if asked.
A “Sellers Disclosure” is a document the owner of the property fills out that provides information on the property, such as the location, the amount of land, the condition of the property, etc.; this document should be part of the documents the realtor receives from the owner at the time of “listing”. All states may not require this document – and it may not be called by the same name – but ask the realtor for a copy of anything the owner may have provided that discloses information about the condition of the property, taxes, location of the property, current survey availability, etc.
To clarify for those who may not be familiar with the term, a “listing” is an agreement between a realtor and the owner of a property; it lays out the legal description and location of the property for sale, asking price, and other pertinent information such as how the realtor will be paid if the property is sold – usually the realtor is paid by commission based on the final sale price of the property.
The realtor representing the owner may legally, depending on state laws, be allowed to help the buyer in completing a written offer to the owner for consideration. If the owner accepts the offer, this written offer usually becomes a “contract for purchase”. However, again depending on state laws, the realtor may then be placed in a position of “neutrality” for the duration of the sale and only allowed to pass information back and forth between the parties – but no advice could be dispensed to either party. If both the seller and the buyer are knowledgeable about real estate transactions, this situation may be acceptable to them, if not, it is best that each party – the seller and the buyer – have their own realtor representing their separate interests in the sale. Keep in mind, real estate sales are no less a “buyer beware” industry than the used car business!
Now, what I am about the write may not make me popular with realtors, but so be it. When dealing with realtors, even a realtor you have engaged to represent you in a real estate transaction – be circumspect! Do not engage in banter about your personal affairs, don’t “gush” over a particular property – don’t reveal any information that you would not want the opposing side of the transaction to know about you or your finances. Believe me, this is “intel” that may influence the terms of the contract. All the realtors should be concerned with is the transaction at hand – what property is being purchased, the price and how will it be paid for, the specific tasks to meet the contractual requirements, and when the sale will be closed and they get paid – period!
You have the right to have inspections done on structures – home and other buildings; you can also have inspections done of the septic system, the water well, and perform soils tests. These things must be included as written requirements with the offer to the owner.
The realtor listing the property for sale should ensure the person signing the “listing” agreement has the authority to place the property on the market, either as the owner of the property or the owner’s agent. If there is a discrepancy between the name on the listing agreement and the name on the appraisal district rolls as the owner of the property – question the discrepancy. This may avoid a lot of confusion later on in the process.
When dealing with country property, there are many things you must consider, such as water and mineral rights – for example, has any of these rights been sold separate from the property and what is the potential impact of buying a property in this situation?
Are there current leases on the property, such as leases to drill for oil and gas, grazing, farming, mining, timber, etc. – if so, what are the terms of the leases?
Is there a current survey on the property – if not, what is the cost and time frame for getting one in hand? I do not recommend purchasing any property without an acceptable survey – you need to ensure the property you think you are purchasing is in fact THAT PROPERTY! People have bought property thinking they were buying 100 acres, but when the survey was completed this was not the case. Financial institutions will not make loans on real estate without an acceptable survey.
Are there pipelines, utility lines or other “right-of-ways” running across the land that will prevent certain areas of the property from being fully utilized?
Are there any federal, state or local regulations or ordinances that impact usage of the property, for example, remodeling structures? Are there known endangered species living on the property or wetland areas that cannot be developed by law? Are there parts of the land that cannot be utilized due to seasonal flooding or extreme geography?
Are there current local tax exemptions on the property, such as agriculture or timber exemptions – will you be able to maintain these exemptions after purchase and if not, how will this affect your property taxes? Keep in mind if the owners are elderly or disabled, there may be tax exemptions on the property that you may NOT be eligible to maintain and will definitely affect your taxes!
How is the property accessed? You will occasionally find country property for sale that is “landlocked” – no legal access to the land exists from a public roadway? If access is not via public road frontage, is access provided via someone else’s property? Are there restrictions on using this access? Must you purchase additional land to be able to access your land? Just keep in mind, if there is no legal access, you can be cut off from accessing your land at any time.
Are there crops, equipment or livestock that must be considered in the sale and if so, how will these issues be handled as part of the sale?
These are some of the considerations when purchasing country property - buying country property can be more complicated than purchasing property in the city.
Some advice I will pass along, 1) be on-hand for ALL inspections and 2) as the buyer you have the choice of which company to handle escrow deposits and closing documents for the sale of the property; chose an office within driving distance of the property. Arrange with your realtor for you both to do a "walk-through" of the property at the shortest possible time before closing. Your realtor should inform the seller's realtor of the intent to do a "walk-through" prior to closing - it does not matter if it is just raw land with no structures - do a "walk-through" prior to closing. This puts the seller on notice! The goal is to ensure the seller has done what was laid out in the contract with respect to removal of items from the property prior to sale or requested repairs have been made satisfactorily, or that they have not removed or damaged something that was part of the contract for sale. Believe me, some people can be quite naughty about meeting contractual requirements and a last minute "walk-through" may save you from closing before contractual requirements have been met. Failure to comply with contractual requirements constitutes a breach of contract! If this happens refuse to close on the property until the seller has complied fully with the contract. DO NOT CLOSE AND THEN EXPECT THE SELLER TO COMPLY!
Take your time, do your homework, and get someone knowledgeable to help you find the right piece of property and negotiate the sale if you are not experienced in country property purchases. It can save you a lot of heartache and a negative impact on your bank account!


Monday, November 16, 2015

How to Reduce Stress While Improving Your Ranch's Bottom Line


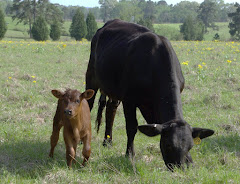
Folks, ranching is a business – a tough business - to be a success it demands time, physical strength, and intelligence with a good dose of common sense in the mix; it can at times definitely increase stress in life, between operational decisions, the fluctuating prices in the cattle market, and the vagaries of Mother Nature. Successful ranchers analyze their operations and are willing to try different techniques or ideas to improve operations and the ranch’s bottom line.
I often hear ranchers lamenting they don’t have time for vacations, they are losing calves, they are losing money, and on and on. Yet many ranchers ignore one of the best tools available to them – a controlled breeding program. Basically, a controlled breeding program is a plan for when the cattle breeding season will begin and when it will end. The ability to control the “breeding season” is an important aspect of ranching and one that I often see overlooked by ranchers – even ones that have been raising cattle for decades!
A controlled breeding program is a very cost effective practice; it enables the rancher’s dollars to be focused on nutrition at specific times to ensure a successful breeding season for mature animals and good weaning results for the calves. It also enables the rancher to predict when and if additional labor will be needed to assist with specific operations and plan accordingly.
A controlled breeding program helps the rancher focus on one major operation at a time which greatly reduces overall stress for the rancher. For example, the cows will all be giving birth within a specific window of time, this enables the rancher to closely monitor the cows for calving difficulty and respond accordingly to increase the survival rate for both the cow and the calf.
The calves in turn will be uniform in age allowing for veterinary tasks to be administered in total on given dates which saves the rancher both money and time. And the calves will be more uniform in weight when ready for sale; they can all be sold together when a weight is reached that the rancher determines will bring the most income.
A controlled breeding program helps the rancher identify cows that are not reproducing and thus not adding value to the herd. These cows can be then be culled to make way for more productive animals. Additionally, knowing exactly when the breeding season will begin the rancher can determine whether or not to replace or maintain an existing herd bull, schedule a “lease” a bull for the breeding season, or to utilize artificial insemination (AI) to achieve specific breeding goals for the herd and make plans for this.
One of the biggest and most stressful mistakes we made when beginning ranching was to allow our bull to run full-time with the cows for two reasons - 1) bulls can be very destructive and 2) you cannot control the “breeding season” if the bull is constantly present in the herd.
We started off with 11 heifers and a registered Angus bull with a 22 letter name that we shortened to “Buddy”. Since we were new to raising cattle we emulated what local ranchers did – let Buddy run with the heifers full time and unknowingly set ourselves up for a tough year. Buddy, the Bulldozer, dug holes – some of them as much as 8 inches deep and two feet in diameter all over the pastures when he wasn’t fighting with the neighbor’s bull and tearing the fencing down. If you have never driven a tractor through one of these holes that you couldn’t see coming for the high grass around it – believe me this is an experience you can do without!
Now, when Buddy wasn’t going at it across the fence line with the neighbor’s bull or digging holes, he was doing the job we “hired” him to do. All the heifers were bred and the calves were on the way – and on the way – and on the way! That first calving season seemed to go on forever! Because the calves, in some instances, were born many weeks apart for a protracted period of time I was up at all hours of the day and night checking on those heifers, needless to say I was pretty tired and stressed by the time the last calf was born.
A few months later as weaning time came around, we had some calves and their Mommas bawling day and night for three days in a row, then quiet (Blessed be!) and then it would start over as the next group of calves reached weaning age! When it came time to sell the calves as a group they were all different ages and weights and although we did make money from the sale the time of year to get best prices had passed.
When the trailer hauling the calves to the sale barn pulled away, I was both relieved and disappointed overall in how the year had gone. I knew there had to be a better way and since we had emulated the local ranchers’ operations that first year with one exception, we needed to search elsewhere for ideas and solutions.
After some research, we found and attended a pasture and livestock management school provided by Texas A & M – it was 3 days long – and was well worth the time and money we spent on travel and the class because we walked away on the last day with a lot of valuable information we could utilize to improve our entire operation.
One of the our goals was to develop a “controlled breeding program“ – we had to determine what was the most advantageous date each year to open the gate and allow Buddy to join the cow herd.
Our approach to a “controlled breeding season” - 1) one of things we discussed in the school was “Body Condition Scores” (BSC) – BSC is the necessary weight of the cow to elevate the chances of successful breeding within a specified time period. All the cows needed to be a minimum of BCS 5 at the start of breeding season, 2) we set a date when we wanted to the calves ready for sale and using this date backed up the calendar to select a “breeding season” and a “weaning season”, 3) Buddy was placed in a pasture of his own that connected to a big stall in the barn to provide shade and shelter from inclement weather with plenty of hay and other goodies a big guy must have to remain happy and healthy, and 4) Buddy would be allowed to run with the herd for 45 days continuously in order to breed the cows, and then he would go back to his pasture. Any cows that did not breed back would be culled.
The desired outcome - the cows would all be in good condition at the time of breeding, and bred within the 45 day period of time, they would calve within a 45 day period, all the calves would be of an age that they could be weaned together as one group, veterinary tasks completed on the group at the same time, and sold together as a group making life on the ranch much easier for all involved and more lucrative. Additionally, we wanted all the calves “on the ground” at an optimal time of the year based on our schedule and feeding requirements for the cattle – maximizing when the pastures were at their most productive. Since Buddy was not roaming free all the time, there would be less pasture and fence damage!
A 45-day breeding season is pretty aggressive, but we felt since we were dealing with mature cows that had all calved before, and all the cattle, including Buddy were in good health, 45 days was doable. And it was; all the cows were bred back within that time frame. Kudos to Buddy!
It took two “breeding seasons” to get everything synchronized to the most desirable dates, but with the calves all coming in close succession, we did not feel tied to the ranch for weeks on end awaiting calving time to be over, and we had more control over the optimum time to sell the calves.
A controlled breeding plan is a valuable tool that every rancher should use to his or her advantage; it should be designed specifically to meet his or her goals and time frames. For example, a rancher may decide to have two “breeding seasons” a year – one in the spring and one in the fall. The season may be of a different length of time – instead of 45 days, it might be 60 or 90 days. The point is that a controlled plan is not set in stone – it can be adapted as necessary – but having a plan can improve the ranch’s financial outcome each year and make life much easier for the rancher and his or her family!

Wednesday, October 28, 2015

Uncle Barney


Uncle Barney and Me
My stepfather had family that farmed a section of land in East Texas; as a child we would visit the farm.  The farm belonged to his aunt and uncle – Uncle Barney; although they were not my family by blood, I claim them by right of heart. It has been decades since my last visit to that farm; they, and my parents, have long ago passed from this life.
Their home was a small wood-frame farmhouse set upon blocks with a metal roof and a wide front porch accessed by steps that seemed to a 4 year old to go on forever. While they did have electricity, water was hand pumped to the house from an old style well. There was a huge barn set back from the house with corrals for Uncle Barney’s team of mules for plowing and cultivating the farmland; Uncle Barney grew corn and watermelons for a living. In the monetary sense, Uncle Barney and my Aunt were by no means wealthy people, but they were wealthy in other ways – it is impossible to put a dollar value on the love their shared for each other and those around them. I have thought many times what a shame they were never blessed with children of their own.
Visits to the farm were always met with lots of laughter, hugs, and barking dogs running everywhere. First things first after greetings, Uncle Barney would take my hand and off we would go to the barn. He stored hay and corn on the cob for his mules in the barn; he would call the mules up to the barn so I could feed them corn cobs. On many occasions, hand in hand we would walk through the fields of corn and watermelons as he checked the status of the crops and quietly talked about life on the farm. Uncle Barney did not talk much unless it was about farming. At the end of the day, meals were shared at an old table in their big kitchen and afterwards we would all sit on the front porch and watch the sunset. When the weather was bad, after dinner my Aunt would break out the dominos – and all the adults would play while I watched. My how that lady loved to play dominos – and she usually won!
When I was 10, my Aunt, and Uncle Barney left the farm and moved into the city a few blocks from our home. Uncle Barney could no longer work the farm, he had developed Diabetes – he was blind and bedridden. The house they lived in was located between our home and the elementary school I attended. On many afternoons, I would stop by their home to visit with Uncle Barney on my way home from school. He would ask me to read to him – the Bible, sections of the newspaper, sometimes from books from my school’s library; many times he would just hold my hand as he talked about the farm – planting and harvesting, the years of bad weather, the years of good crops, his mules. It was obvious even to a 10 year old this was a man who loved the land. And then one morning Mother told me Uncle Barney has passed away during the night. On one hand, I was glad he was no longer suffering; on the other hand, I felt his passing left a big hole in my heart that could never be filled again.
At one point in my teens, I was going through a particularly stressful time; one night I dreamed of Uncle Barney and the farm. The dream was so vivid I could feel my hand in his, the sun and breeze on my face as we walked across the fields, I could smell the fresh-turned Earth. I heard his voice and although I could not make out the words, a sense of calm just seemed to flood my mind. When I awoke, the problems I faced were still there, but they didn’t seem so overwhelming anymore.
Timed passed and I didn’t actively think of Uncle Barney again until one day years later while driving home from work alone. Traffic was particularly bad that day – bumper to bumper – a large box van was in front of me on the roadway; when we came to an intersection not far from home, the van signaled a left turn. I decided to go around the van by passing on the right using the shoulder of the road. I pulled around beside the van and was about to enter the intersection when I heard a voice screaming at me to stop! I slammed on the brake almost an instant before a car came barreling through the intersection – the driver of the car had run the red light. If I had entered the intersection, he would have broadsided my car on the driver’s side; as fast as he was driving there is no doubt in my mind I would have been killed that day. I recognized the voice that had spoken to me.
As we age we tend to reflect upon the past - remembering people, places, and events that shaped or had an effect on our lives. Some memories are crisp and some are like fleeting shadows through our mind that briefly reach out to us at unexpected times and in unexpected ways. I have often thought about these two particular incidents over the years and have come to the conclusion that if Guardian Angels are real; I have one – Uncle Barney.
To this day, there are times when I can close my eyes and envision that kitchen - the sound of laughter, the smell of my Aunt’s homemade biscuits. I can hear the rain on that metal roof as I lay in bed at night. I can hear Uncle Barney calling the mules to the barn and feel the sun on my face while walking through the fields of watermelons hand in hand - listening to Uncle Barney’s voice.
Simple, but happy times stay in the heart and the mind forever!
In loving memory of -
Uncle Barney
Born: October 7, 1900 – Died: March 16, 1960
Gone but never forgotten!